Proof that you cannot have your cake and eat it too, either way, the ever continuing pursuit of a search result containing actual information about what you are trying to discover is a good thing, be it good or bad in the eyes of the all mighty server in the sky.
Official Google Blog: Being bad to your customers is bad for business
Wednesday, December 1, 2010
Monday, November 29, 2010
installing the plugin
Installing the plugin.
locate the plugin menu on the lower right hand side of the admin section of wordpress.

Click on the Add New button
Now just click on the upload link like below

This will open a browse page where you may locate and select your plugin.
Browse to the zip file included with your download
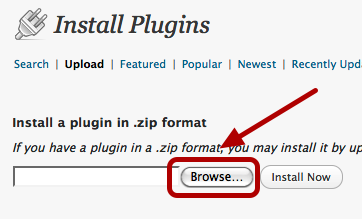
Select Browse, and then locate the plugin zip file
You will then see an install button

Click the install button from time to time some web hosts have issues with this method of installing plugins, if you have an issue, please use your favorite FTP file transfer, program and upload the plugin to the plugin directory
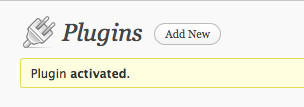
Once you have successfuly uploaded the plugin activate it,

after you click on activate you should see this message.
That is it, your activated and your ready to use the plugin.
Ok, now lets move on to the the Method which is the other half of method blogging, please refer to the documents that came with your download.
Monday, July 5, 2010
signup
Signup for Alexa services.
Fill out the information requested.

Then click the register button.
Once you successfully submit the form you will see this message.

Then you need to check your email and activate your account.
click on the link in the email

Then you will be on your way...
You will be taken to the website and then you will need to enter your email and password.

once you do this click on submit.
You will see this message once you click submit.

The next step is to begin setting up your account
Click for site owners claim you site, and follow the directions

upload a text file or setup a meta key so alexa can verify the site is your.
Once you get this step done you can continue to setup your account.

You need to provide as much information as you can so that you can show alexa information, it will help you get more money for the products and websites you sell.
Tuesday, June 29, 2010
seo links
This is how easy it can be to use our plugin.
Watch this...
Just click on a post you want to exchange a comment link...

click on the title.
Just fill out the form and you get a back link, it is that easy.

This is really easy and you will like it, trust me you will,
In fact we will be selling this plugin on the warrior forum soon so try it out...
Signing up
Want to get Free Credits...
Sign up for your account at Flippa
Step One, navigate to Flippa.com you can click on the link below.
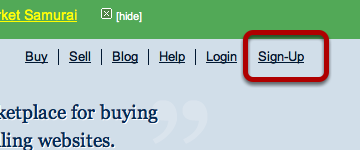
Flippa.com click here to get started. At the top right hand corner of the website you will see the signup link just click that and your on your way.
Fill out the requested information.

Once you have filled in the form, click the sign me up button.
You will see a message like this one
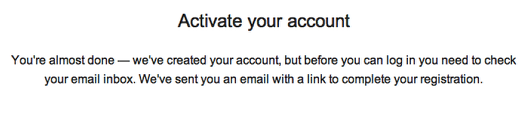
Check your email and activate your account.
Click on the link you receive in the email they will send you
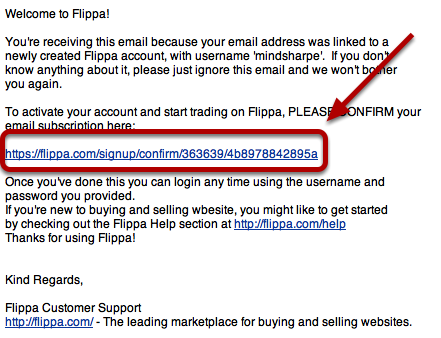
You have to follow through with this step before you can login to your account.
Next you can begin to setup your account.

The first step is to verify your phone number, this is very imporant to do as much verification as you can so you will have the opportunity to improve your trust.
Trust is a rating of sorts, the more trust you can acquire, the more money you can make when you flip and sell websites.
There are several steps you need to take in order to continue to setup your account, just follow the directions and you cant go wrong.
Be sure to check out our other lessons that will take you by the hand and guide you step by step through the process of creating and selling web properties.
Thursday, June 10, 2010
Setting up Spam protection
Follow these easy do it yourself instructions
One of the considerations that you need to make is to protect your blog from comment spam.
Be sure to visit our websites, http://www.easywpconfig.com and http://www.wordpressrepost.com
One of the considerations that you need to make is to protect your blog from comment spam.
Be sure to visit our websites, http://www.easywpconfig.com and http://www.wordpressrepost.com
You could find yourself overwhelmed by spam, it is everywhere, you may not be able to stop it completly...

here you can see that we have in the past had a lot of trash comments, and some good ones too but just to show you this is before we installed what they call a captcha form, this is what they use to reduce the amount of comment spam.
Please note that you may never get rid of all the comment spam, but you can reduce it.
We recommend getting Si Captcha, which is a nice little plugin that will reduce the unwanted spam in your comment box.
So follow the directions. to get and install the plugin.
Please note that you may never get rid of all the comment spam, but you can reduce it.
We recommend getting Si Captcha, which is a nice little plugin that will reduce the unwanted spam in your comment box.
So follow the directions. to get and install the plugin.
First lets go to the plugins link like so...
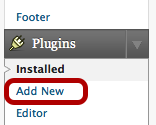
click on add new....
You will see the search form, copy the text below to find it, in the wordpress system

si captcha
Now you will see this...
Now you will see this...
this is the plugin you want to install now just click on install.
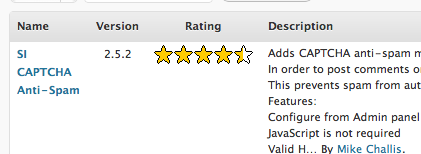
You may need to look to the right hand side but you should be seeing a link that says install.
click on install

And you should see the plugin getting installed, if there is a problem, back up and try again. . .
But usually all will be well when you see this.
But usually all will be well when you see this.
This is the form that will allow you to install it, look to the right hand side.

click install now.
And wait...
Then you will see this... If not wash rinse and repeat...
And wait...
Then you will see this... If not wash rinse and repeat...
You will see a list showing the plugin getting installed.

Now just click on activate...
Now lets set up that plugin
You can donate if you like but lets try this thing out first...
Select the options you want to have and just click update...
Now there are a lot of other options but that one is the most important one you can experiment with different settings.
and there are a lot of nice options to try out.
So now you should click update options at the bottom of the form otherwise it will not work.......
After you save the options by clicking update you can then see captcha in your forms like this...
Now you will see this at the bottom of your comments posts this will really cut down on spam
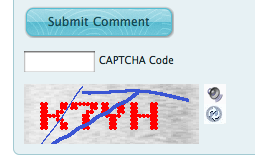
Hope you have enjoyed this short lesson, remember if you do not see the captcha code like above it may be because you are still logged into your admin.
By default it is setup so that registered users, will not see it, this encourages, users to be logged into your site...
Also a good thing, but to see this and see that it is working then you need to either uncheck that option or logout.
happy blogging....
Be sure to visit our websites, http://www.easywpconfig.com and http://www.wordpressrepost.com
Uploading the plugin
Welcome, for more information on this plugin please visit our website at http://www.wordpressrepost.com
Ok, This PDF file or website depending on where you are reading this support document, will guide you though the process of installing the SEO, link exchange plugin.
It is realy not that hard, but you will have to do a few things and follow some easy to follow instructions.
Lets get started.
Upload, the plugin, There are two way, one is FTP, the other is using the admin panel,

If you know how to use FTP, then that may be faster for you and easier, but if you do not know how to use FTP, then this will be your best method.
Select Add new in your wordpress admin panel.
Now, just follow the directions and your halfway done.

Click on the Upload text link.
Now click on Choose File, please note that you need to upload the zip file that came with your purchase.
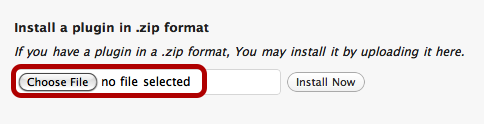
When you click on choose file a dialog will appear on your computer, now just locate and select the file you received when you purchased seo link exchange.
Select the file

And upload it,
Now click on install now
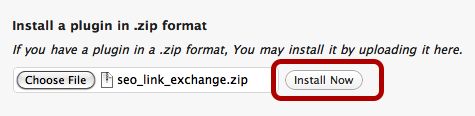
Special note, if something goes wrong here you may have to upload it using FTP, so dont panic if you get an error message.
It will happen from time to time, it is because some zip files may not work the same on every computer.
So if this happens then you will need to manually install the plugin, using an FTP program...
Most of the time this is how it will look... Success...

Now just click Activate Plugin...
Congradulations, you now have activated your plugin.

Your almost done, there are just a few more steps and you will be finished.
In the right hand column, you will see at the bottom,

Let Setup the plugin.
Just click on settings...
See the form below, it will be blank when you first start just fil in the blanks.
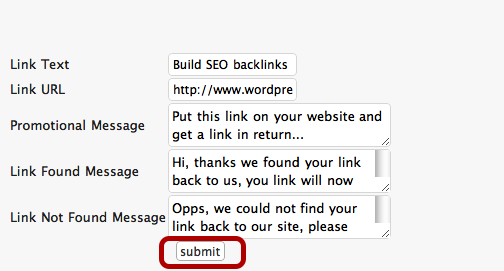
the frist line is for the text you want your link to show when it is put on someone elses website.
So use, keywords that describe your website, it helps to use some of the same words that you are already targeting for your website.
An example would be this, if you are targeting the pet owner niche, then you might have something like ( the best cat food )
Then put the URL you want to put in your link.
This is how a web visitor will be forwarded to you website, so pick a website page, that you want to promote. (usually the home page)
Nest, place your promotional message, this is what you will use to get your link exchange partner to install your link on their website.
So use something that will promote what you have to offer and that is a back link.
Now you have only two fields left,
link found message This is the message that your link partner will see if they successfully install the link back to your website.
link Not found message This is the message that will show is they make a mistake in the URL with the link or if the link they say is there is not detected.
Ok, now click on submit...
Now the final step and this one is a little hard, but you can do it, remember your almost done...

Now you will see the following directly under your plugin information that you just filled out.
See the number one, copy that small bit of PHP code, you can just hi light it with your mouse and either right click and copy or press ctrl C
Now lets go to the next part, you can go ahead and read the directions, it may help you see how to do this faster, but I am going to go step by step.
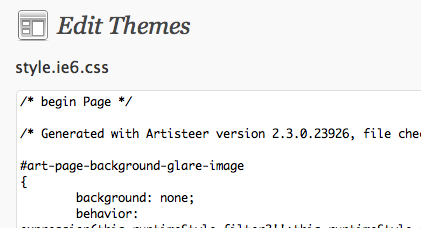
Next look to the left back to the admin bar.
You will see the Appearance tab, if it is not open just click on the little down facing triangle.
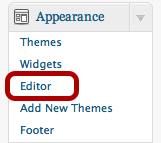
Next just click on Editor...
And then you will be in the editor, so be careful and be sure to follow these instructions exactly...
As well we recommend that you back up your data to be sure that in case you make a mistake that you can easily fix it.
Ok, so below you will see an example of the editor in action.
This is the main editing window, do not change anything here.
Look to the right you will see the window below.
Do you see Comments (Comments.php)
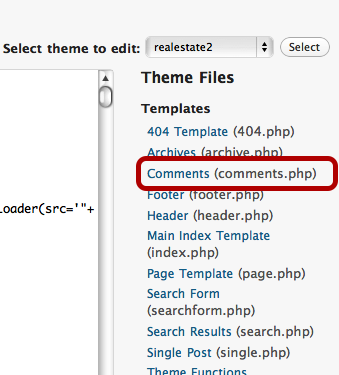
Click on this link and then you will see the following below.
Ok, now we have the window open.
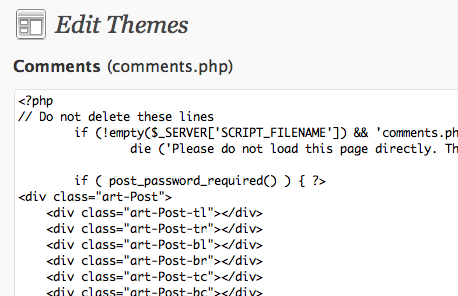
Ok, the first thing I want you to do, is to open a wordpad, or text edit if you are on a mac, and back up your comments.php file, you can do this by selecting all the text in the open window, and copy it, Then you will paste it into the open window and name it commentsbackup
Now that you have done this you can save it in a place where you will remember where it is. (incase you need it, we dont think you will) but safe over sorry...
Now that you have a back up of the comments.php file.
Lets put your PHP script into the editor, first lets find the place where you want to put the PHP code.
Start scrolling down through the code, it may look like greek that is ok we will help you find just the right place.
Find the following line of text,
<p><textarea name="comment" id="comment"
Depending on the browser you are using you may be able to just press ctrl F, and copy that text and search for it, if so it will be real easy
if not you may have to search for it,
once you find this line, then just copy this PHP code and paste it ABOVE the <p><textarea name="comment" id="comment"
like the screen shot below...
Now see the <p><textarea name="comment" id="comment" Ok,

Now that you have your cursor positioned, just press return or enter twice, this will create space for you to put your php code. like in the screen shot below.
Ok, now that you have some space to work with, copy this line of code, because by now, you will need to copy it and then we will paste it into the code.
<? if(function_exists('show_fields')){ show_fields();} ?>
Ok now that we have everything ready to go, lets paste it into the PHP code. Like below.
Ok, you are almost done, and guess what you will now be a programmer, ok well a novice programmer, but hey that is cool right?

Ok, lets paste that code into the PHP,
If it works right, then you will see that line of text appear in the PHP code, it should look like this...

Ok, now that you have it, and if it does not copy right, remember to try it again, and make sure that you get the whole PHP code, it should look just like it does above.
Now the most important part, saving it, Just like below.
OK, so here we go, now just click update file...

after you click update file it will save the edited text, PHP file, and you are done.
You should see Eile Edited successfully.
Congradulations, you have just installed a php plugin, for wordpress. now it was not that bad was it.
If you do have a problem, just go back to your backup file and copy and paste it into the editor and update file again, then you will be right back where you started out.
Safe and secure...
Ok, now there are a few things that you may want to consider, from here and it is important.
So read on.
Number, one, you may and probably will start gettin all kinds of backlinks, which is good.
At first any link is a good link but be sure that you want to have that link on your website.
For instance if they are selling adult merchandise you may not want that link on your website.
IN fact that is definitly not what you want.
But say you have a realestate website, then you want home related links, so these are the links that you will want most of all.
Please see the operation manual for additional tips and tricks to get the most out of your SEO back linking plugin.
You are now on your way to getting that great position you always wanted for your website.
but remember it is not set and forget you still have to do work...
For more information please visit our website at http://www.wordpressrepost.com
Monday, May 17, 2010
Get Free Links
Follow these directions to find some great High PR do follow blogs.

Search for the following words, High PR do follow blogs
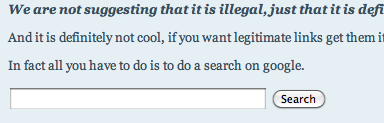
When you do that you will see a list of websites.
Like the one below.
Now check out this list, it is fairly good and you can really get some good links...

So now that you have a place to post a comment, get up a good post and then comment on it.
Fill out a good name, put a real email, address and of course your website,
Now you can see how easy this is, and guess what you have a real link, and if you choose the right kind of post then you get double points.
But putting real comments, that is the trick, because if you do like these spammy auto posters, guess what your post goes right to the trash can...
I know because that is what I do, when I see a post that says, I like you blogger it is so nice, Trash...
Can I use some stuff from your website? Trash
Just put me in the trash can, no problem, Trash.
In fact, there are actually plugins that will automatically put your comment in the trash if you do this.
So how to get that all important link juice...???
Simple, comment about the post, it is really not that hard...
Try it, out. . .
Then sit back and enjoy the link love...
Subscribe to:
Posts (Atom)